



Installation, Safety & Fitment Assurance – Official Distributor | Ride Solutions
1. Professional Installation
While many of our products are designed for straightforward fitment, Ride Solutions officially recommends that all suspension components and chassis kits be installed by a qualified automotive technician or certified welder.
- Your Responsibility: If you choose to install these components yourself, you do so at your own risk.
- Liability: Ride Solutions is not liable for property damage, personal injury, or component failure resulting from improper installation or the misuse of tools.
- Compliance & Right to Repair (2026 Standards): These instructions are provided in compliance with regional Right to Repair standards. However, suspension components are safety-critical. If you lack the confidence or correct safety equipment, please stop and consult a professional workshop.
- Professional Installation: Ride Solutions is a parts-supplier only. We do not provide engineering sign-offs for vehicle modifications. We strongly recommend professional installation.
2. Weight Verification (GVWR / MAM)
- No Capacity Increase: Timbren SES kits and Axle-Less systems improve ride quality and stability; they do not increase your vehicle’s Gross Vehicle Weight Rating (GVWR) or Maximum Authorised Mass (MAM).
- Stay Legal: You must strictly adhere to the manufacturer’s legal weight limits.
- Overloading Risks: Overloading places terminal stress on brakes, tyres, and chassis welds. Ride Solutions holds no responsibility for failures caused by exceeding legal weight limits.
- The 750kg Limit: Ride Solutions supplies Axle-Less™ systems exclusively for brakeless applications with a maximum GVWR of 750kg. Any modification to these units to include braking systems, or use on trailers exceeding 750kg, is strictly prohibited and performed at the user’s sole risk. Ride Solutions disclaims all liability for failures resulting from non-compliant use.
3. Troubleshooting: The “Fitment Anxiety” Table
It is normal for high-performance rubber suspension to look or feel different from factory parts. Use this guide to address common concerns:
| What you See / Feel | Why it is happening |
The Recommendation |
| A gap between spring and axle | Correct design for most SES kits. | No action required. Ensures smooth ride when empty. |
| Spring resting on axle (Empty) | Your OEM leaf springs/coils have failed or sagged. | Check Vehicle Health. The kit is supporting a failed suspension. |
| Bumpstop doesn’t touch plate | Active Off-Road kits allow for travel. | No action required. Engages during compression. |
| Part looks different than OEM | Timbren Aeon® is high-performance rubber. | Trust the Engineering. Designed for much higher loads. |
3.1. Axle-Less™ Wheel & Tyre Fitment Guide (750kg Series)
Strategic Advice for Off-Road & Overland Builders
Standard “thin” trailer tyres often fail to provide the traction and “floatation” required for off-road use in EMEA and Asia. To achieve an aggressive off-road stance while maintaining safety and warranty compliance, follow this checklist before purchasing your wheels and tyres.
3.1.1. The Hub & Bolt Pattern (PCD)
Most Ride Solutions 750kg units are supplied with a 5 on 4.5” (114.3mm) PCD.
-
The Benefit: This is not just a trailer standard; it is the same bolt pattern used by many popular SUVs and Pickups (e.g., older Jeep Cherokees and 2WD Toyota Hilux models).
-
The Goal: Source a wheel with this PCD to move away from narrow utility rims and into wider 15″ or 16″ off-road rims.
3.1.2. The “Offset” Rule (Critical for Clearance)
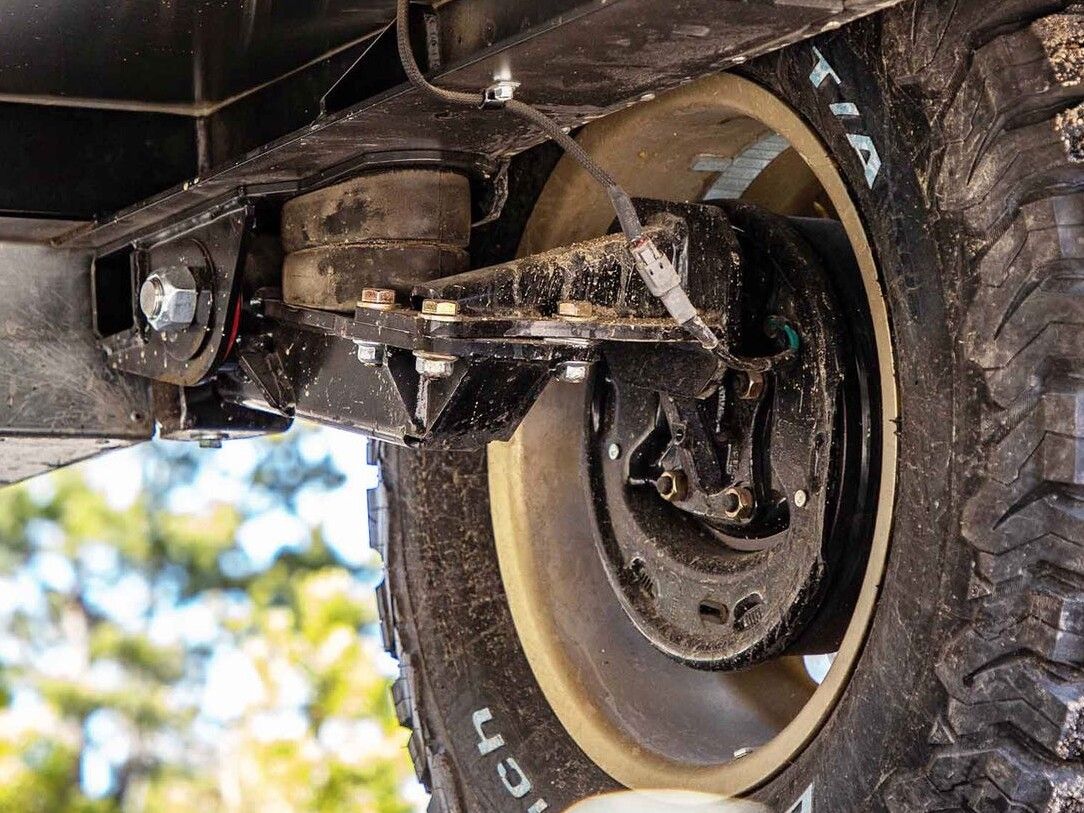
Because the Axle-Less system has no through-axle, the tyre sits very close to the trailer chassis.
-
Recommended Offset: ET 0 (Zero Offset) or slightly negative (e.g., -6mm to -12mm).
-
The Danger: Modern 4×4 wheels often have a high positive offset (e.g., ET +45). Using these will cause the inner sidewall of the tyre to rub against the Timbren steel frame or rubber spring.
-
Solution: Use a “Deep Dish” or “Zero Offset” steel modular wheel to push the tyre away from the frame.
3.1.3. Maximum Tyre Dimensions
To protect the spindle from excessive leverage and ensure the rubber springs operate correctly, stay within these parameters:
-
Maximum Tyre Diameter: 30 inches (762mm). (Commonly found as a 235/75R15).
-
Maximum Tyre Width: 235mm.
-
Note: Fitting “33s” or “35s” to a 750kg unit exceeds the engineered leverage limits of the #2 spindle and will void your warranty.
3.1.4. Recommended “Chunky” Off-Road Combos
For the best balance of aesthetics, off-road performance, and safety, we recommend:
-
The “Overland” Setup: 15×7″ Zero Offset Steel Wheel + 235/75R15 All-Terrain (AT) or Mud-Terrain (MT) tyres.
-
The “Compact” Setup: 15×6″ Zero Offset Wheel + 215/80R15 All-Terrain tyres.
3.1.5. Summary Checklist for Your Wheel Supplier:
-
[ ] Bolt Pattern: 5 x 4.5″ (114.3mm).
-
[ ] Centre Bore: Minimum 71.5mm (to clear the hub dust cap).
-
[ ] Offset: ET 0 (Zero Offset).
-
[ ] Tyre Diameter: Under 30 inches.
-
[ ] Load Rating: Minimum “Li 100” (800kg) per tyre.
4. Pre-Purchase and Pre-Installation Safety
Before beginning any installation, you must ensure the following safety protocols are met:
- Drivetrain: Verify 2WD vs. 4WD and Single vs. Dual Rear Wheel (SRW/DRW).
- The “Obstruction” Check: Ensure a clear “flight path” for the spring, free from brake lines, wiring looms, or exhaust heat shields.
- Axle-Less Clearance: Ensure a minimum of 50mm clearance between the inner tyre sidewall and the frame, with a mounting surface at least 50mm wide.
- The vehicle must be on level ground.
- Wheels must be chocked to prevent any movement.
- You must use jack stands with the correct weight rating for your vehicle.
- Never work under a vehicle supported only by a jack.
- Ensure you have read the specific installation guide for your specific SKU.
5. Technical Support & Advice Policy
- Scope of Support: Support is strictly limited to informational guidance regarding product fitment and general procedures.
- Advice vs. Instruction: Any advice provided via telephone, email, or live chat is for guidance purposes only. Because we cannot physically inspect your vehicle, our advice does not constitute a professional mechanical instruction.
- Right to Refuse Support: We reserve the right to withhold technical advice if we believe a customer is attempting an unsafe modification.
- Stop-Work Clause: If a kit does not fit easily, DO NOT force or modify the part. Contact us immediately with high-resolution photos. Modifying a kit without written authorisation voids your warranty.
- Requirement for Professional Assessment: While we strive to be as helpful as possible, remote support is not a substitute for an on-site professional mechanic. If you encounter any resistance, fitment issues, or uncertainty during installation, you must stop immediately and consult a qualified automotive professional. Ride Solutions will not be held liable for any decisions made by the customer during a DIY installation.
- Not a Mechanic: Compatibility data is for guidance only. The final verification of fitment and safety remains the sole responsibility of the purchaser and a qualified automotive technician.
6. Technical Checklist (Required for Support)
To protect your safety, Ride Solutions maintains a “Photo-First” Policy. Park on Level Ground: Ensure the vehicle is not on a slope and the handbrake is on and free of load. We cannot provide troubleshooting until you provide:
- The “Gap” Photo: This image should capture the space between the spring and axle when the vehicle is unloaded.
- The “Profile” Photo: A side-view photograph of your vehicle while parked on a level surface.
- The “Axle” Photo: A clear image of your rear axle, specifically documenting the factory bump stop and its contact point on the axle.
- The “Suspension” Photo: A clear image showing your current suspension setup, whether it’s leaf springs, coils, or another type. with swing arms if needed.
Expert Tip: If possible, include a photo with a tape measure held between the bump stop and the axle; this aids us in choosing the optimal spring density for your specific load.Installation Photos: Provide clear pictures of the kit as it is mounted on the chassis/axle.
For photos of the Timbren kit installed, please provide clear images showing the kit fitted to the chassis/axle.
Please email photos and details to info@ride-solutions.com
7. Limitation of Liability
Ride Solutions, its employees, and its directors are not responsible for:
- DIY Outcomes: Injury or damage resulting from non-professional installations.
- Inadequate Equipment: Failures caused by incorrect tools or unstable jacks.
- Pre-existing Conditions: Issues arising from rusted frames or prior structural damage.
- Indirect Loss: Costs for vehicle downtime, recovery fees, or missed travel plans.
“Please Note: Our technical advice is provided for informational purposes as an EMEA distributor. We always recommend that suspension components be fitted by a qualified professional. Ride Solutions is not liable for outcomes resulting from DIY installations.”
“If a kit does not appear to fit easily, DO NOT force it or modify the part. Contact us immediately. Modifying a Timbren kit without written authorization will void your warranty and may compromise vehicle safety.”
Welcome to the new Ride Solutions. Let’s get your vehicle level again.